Upload a document to your personal objective
In this lesson, you will learn how to upload a document to your personal objective in the conversation area. Uploading a document is not typically a requirement of the objective process in StaffCircle, however you may wish to upload documents to evidence your achievements for example.
Supported document/file types include: PDF, DOC, DOCX, PNG, XLS, XLSX, TXT, JPG, JPEG, PPTX, RTF, WEBP, MP4, MP3 & GIF.
Uploading a document to a personal objective will upload this to your personal document area. Your personal document area is typically accessible by your manager, as well as yourself and platform administrators.
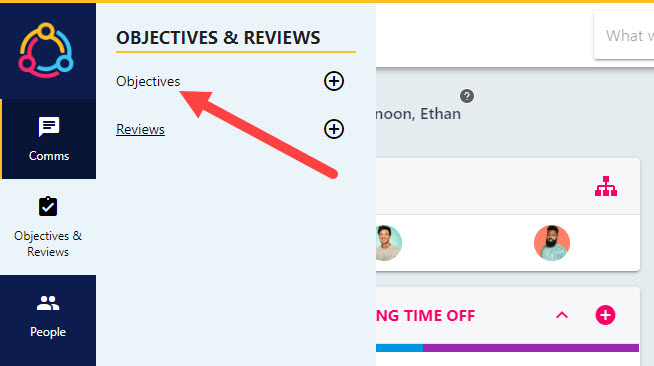
Step One
Hover over the Objectives and Reviews section of the side-bar, then navigate to: Objectives & Reviews ➡️Objectives. Select the Objectives title from the sub-menu to view your open personal objectives.
Step Two
Select tile associated with the objective you wish to upload your document to. This will open up objective’s progress drawer to the right-hand side of the screen and is the same drawer used to update the progress of the objective.
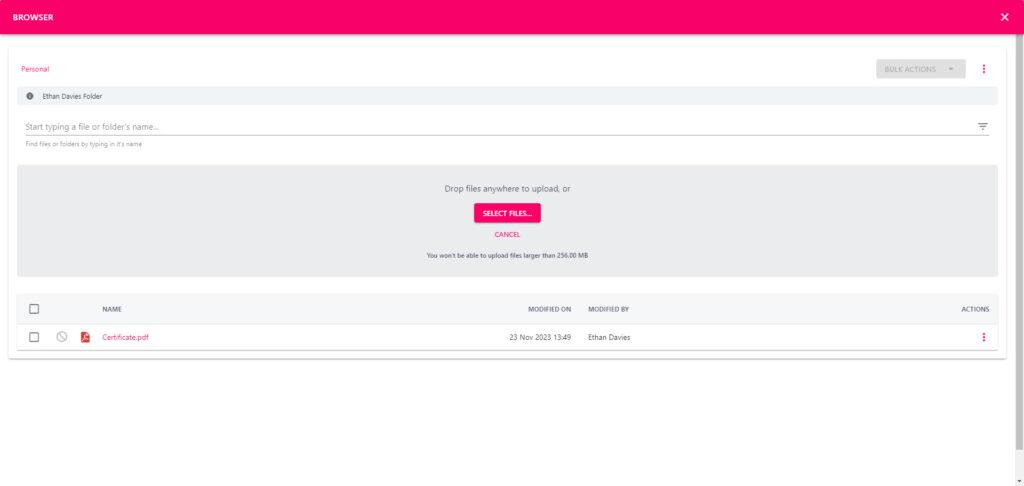
Step Three
Scroll to the bottom of the progress drawer to the ‘Objective Conversation’ section. This is the area where you can view and add comments to the objective. Select the paperclip icon to select the document you want to upload – this will open your Personal document folder.

Step Four
If the file does not already exist within the personal document area, click on the three dots/kebab to the right-hand side of the screen and select ‘Add File’ from the drop-down menu. Then click on the SELECT FILES button in the centre of your screen to choose the file from your personal device.
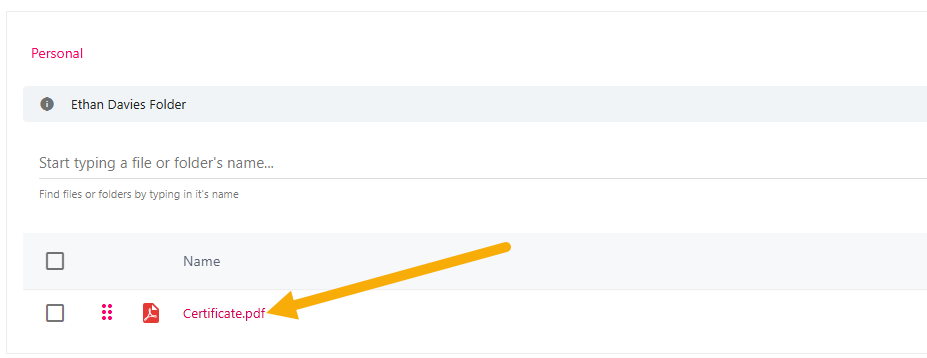
Step Five
Once the document has been uploaded to your personal folder it will appear towards the lower half of the page, select the document’s title to attach this to the objective.
Step Six
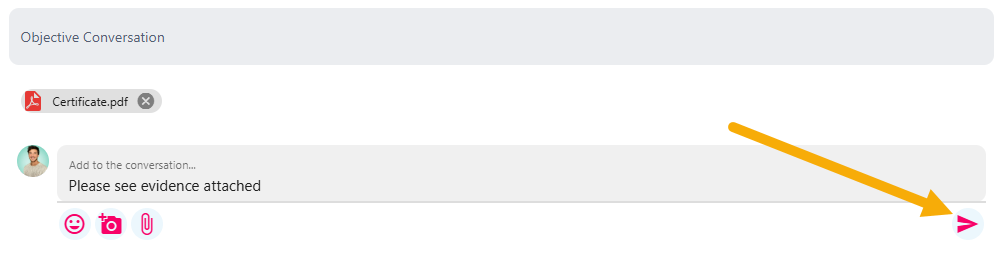
The document will now display above the text box in the Objective Conversation area. We would recommend populating the text box to provide context to your manager (or objective reviewer) regarding the file you have attached.
Step Seven
Click the paper aeroplane icon to attach the file and publish the associated comment. This will notify your manager (or objective reviewer), who will be able to view your comment and view the attachment.