Working Patterns
Working Patterns are important so that the platform understand when an employee typically works. This means that the platform can determine how much allowance to deduct from the employee’s holiday balance. It is likely that your organisation will maintain a number of working patterns in the platform to accommodate for employees who work part time, compressed hours, job shares etc.
For example, if an employee works Monday to Friday 9-5, then the employee’s balance will be unaffected if they include a weekend date. This is because the working pattern would dictate that the employee does not work on these days.
Working patterns can be configured at employee level and do not need to be tied to a specific absence policy or working pattern. So whilst employee’s may have the same holiday allowance, the days/hours that they work can differ. The relevant section of this page will show you how you can change an employee’s working pattern via their profile area.
Working Patterns are a critical component to our TOIL feature, and how is works in your platform. When creating a working pattern you can specify the number of working hours within a day, which will accurately calculate when an employee had reached enough TOIL hours for a half day (0.5 days). For further information on our TOIL feature, please refer to this StaffCircle University guide.
Working patterns can be assigned to Absence Policies so that assigned employees inherit the associated working pattern. For further information, refer to the Absence Policy page.
Create a Working Pattern
There are two stages to adding a working pattern to the platform. The template creation is covered in steps one to four, however in order for working patterns to become functional you will need to add cycles which is covered from step five onwards.
Step One
Hover over the Time Off section of the side-bar, then navigate to: Configuration ➡️ Working Patterns. Select the ➕ next to Working Patterns to open the ADD WORKING PATTERN pull-out drawer to the right-hand side of the page.
Step Two
Provide a Title and Description for the working pattern. We would recommend naming this to the summarise the working days/hours i.e Monday to Thursday.
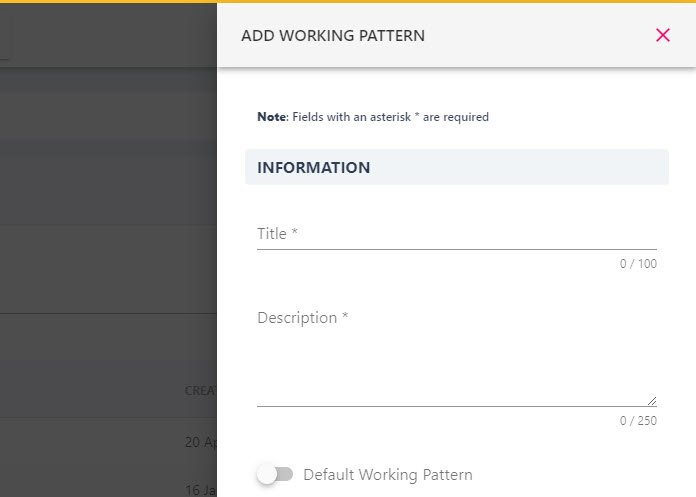
If this is the working pattern you wish to assign to all new users in the platform, then toggle on the Default Working Pattern switch.
Step Three
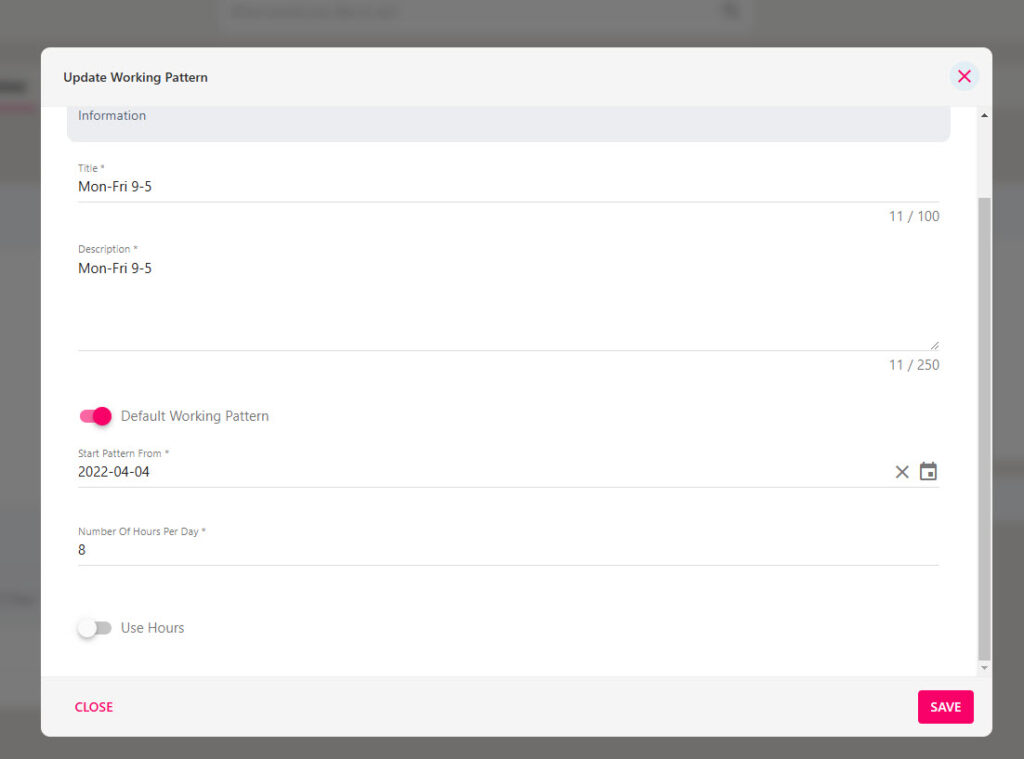
Choose a date to start the working pattern, ensuring that this date falls on a day of the week the employee works. If the employee works on a Monday ensure the working pattern starts on a Monday, if the employee works on a Tuesday (but not a Monday) then start the working pattern on Tuesday.
Step Four
Specify the average number of working hours per day, this applies even if the employee works different hours over different days. Use the calculation below to help you:
number of contracted hours per week / number of days the employee works = number of hours per day
If an employee works 40 hours Monday to Friday -the number of working hours per day equates to 8.
If an employee works 21 hours Monday, Tuesday, and Friday – the number of working hours per day equates to 7.
If the working pattern is to be calculated in hours (as opposed to days), then toggle on the Use Hours switch.
Step Five
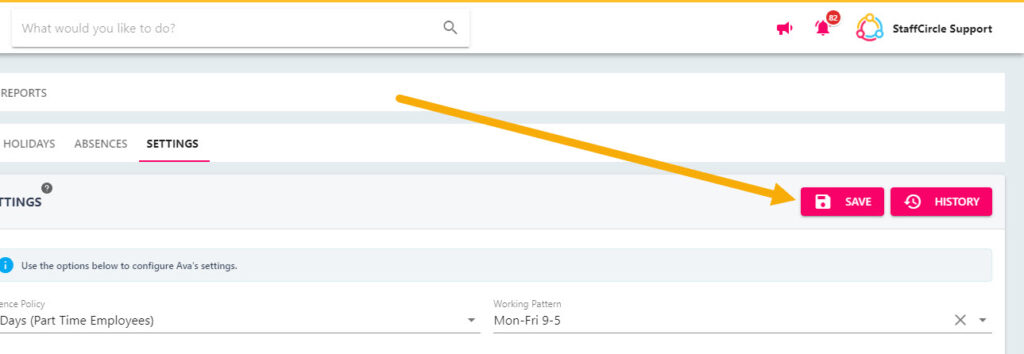
Click the SAVE button in the bottom right-hand corner of the drawer. This will take you to the details page of the working pattern. You will now need to add the cycles to determine when the employee is working.
Step Six
Click the ADD button within the CYCLES WITHIN WORKING PATTERN box. This will open the ADD WORKING PATTERN CYCLE pull-out drawer to the right hand side.
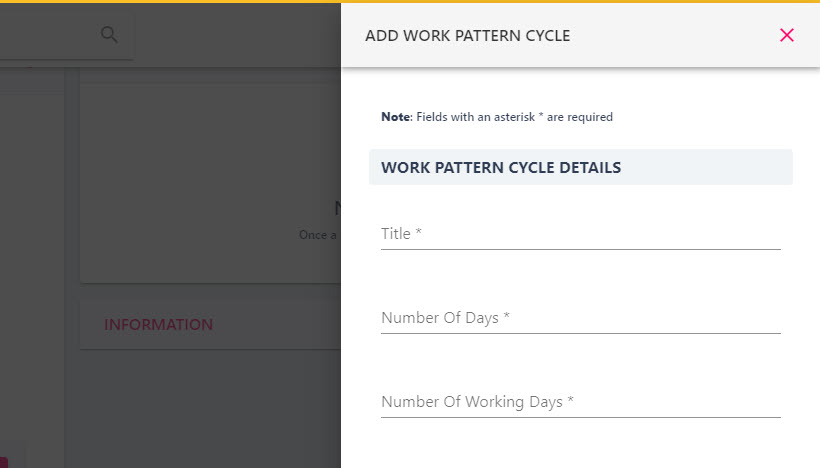
Give the cycle a title. For example, you may wish to call this something which illustrates the working days i.e Monday – Thursday. In the number of working days field, enter how many days in that cycle are working days (this may well be zero working days).
The number of working days will always be the first part of the period followed by any remaining days in the cycle which will be marked as ‘non working days’.
Step Seven
Click the SAVE button in the bottom right-hand corner to add the cycle to the working pattern.
It is more than likely that the working pattern will contain at least two cycles to accommodate for the employee’s non-working days. Repeat step five to add additional cycles.
Step Eight
After the cycles have been added, check the calendar in the lower half of the page to ensure that this is reflective of the employee’s working pattern.
Change an Employee’s Working Pattern
The default Absence Policy is automatically assigned to an employee when they are set up in the platform. However, the absence policy can be updated against the individual’s profile.
The main reason why you would need to change an employee’s working pattern is if they work days/hours which differ from the working pattern, or their working days/hours have changed (i.e employee’s that move from full time to part time).
Step One
Hover over the People section of the side-bar, then navigate to: Manage ➡️ People. Select the People title to view a list of employees in the platform.
Step Two
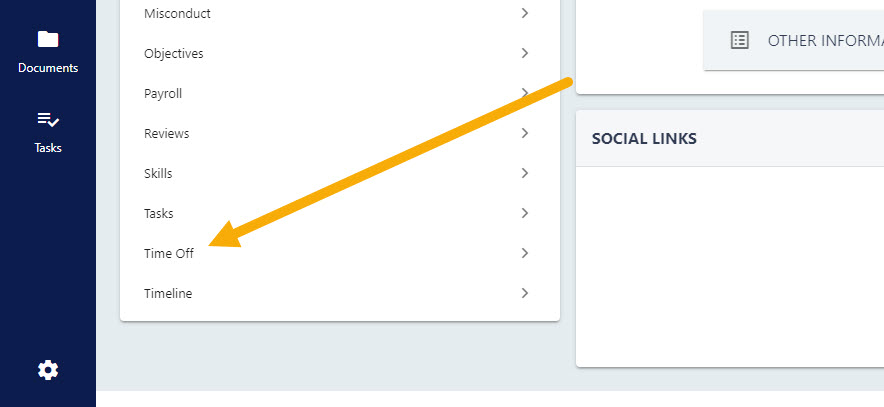
Select the employee’s name from the list to open up their profile, then elect the Time Off tab on the left hand side of the page.
Step Three
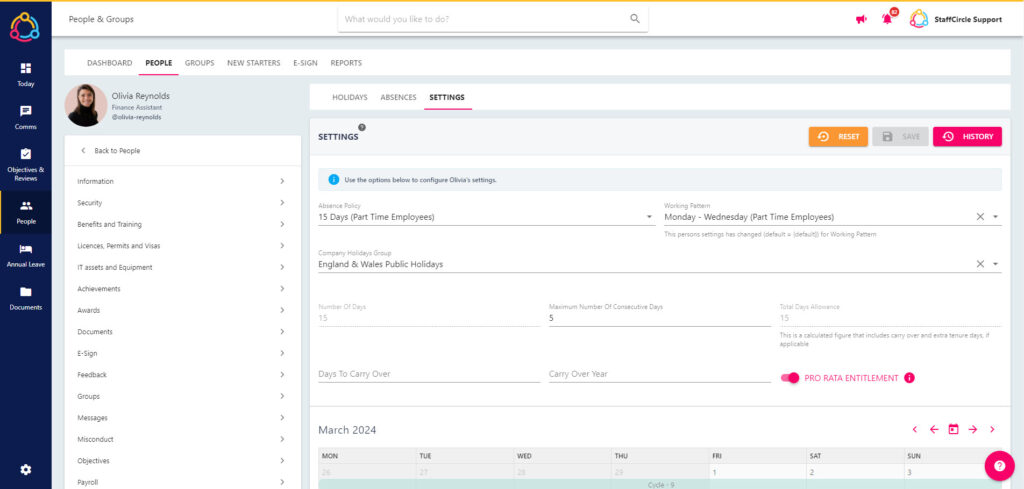
Select the SETTINGS tab at the top of the page, this will display the employee’s current Absence Policy, Working Pattern, Company Holidays Group etc. In the Working Pattern drop-down field, select the new pattern from the drop-down.
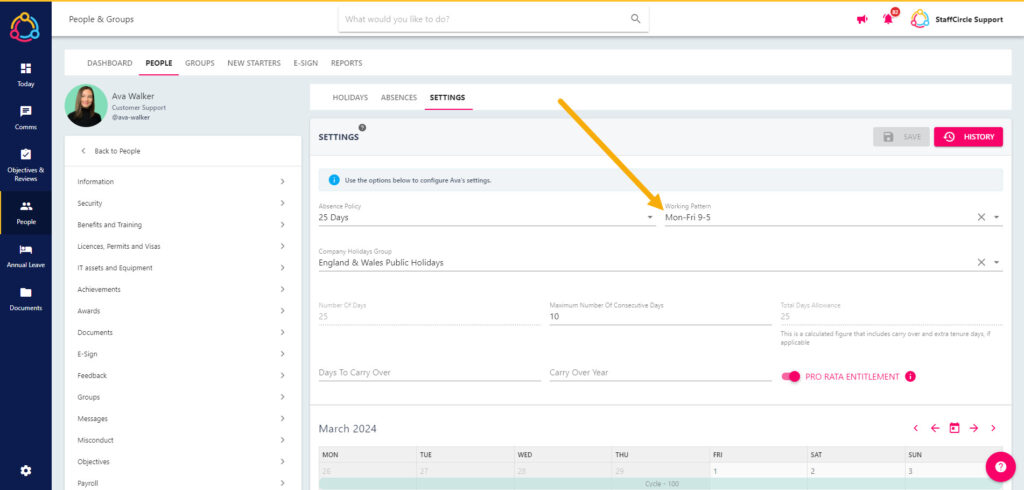
Step Four
Click the SAVE button to save any changes made to the employee’s absence settings.