Objective Priorities
Priorities are a great way to help assignees/reviewees determine the order and urgency of which their objectives are to be progressed. Priorities do not change the way an objective behaves, but it is a helpful visual indicator to the individual assigned the objective, as well as their manager.
There are three priorities in your tenant by default: high, normal, and low priority. You can amend or define new priorities in your platform by following the guidance in this lesson.
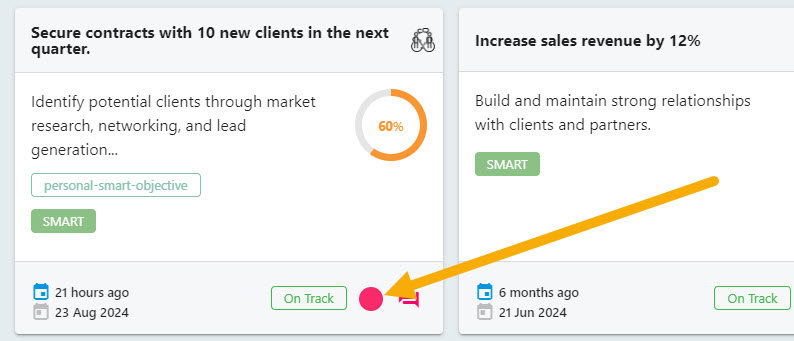
Priorities in StaffCircle will appear as coloured circles on the objective tile (example above is a personal objective shown in the employee’s personal objective area), and on the Objective Manager page as a manager viewing objectives.
A priority can be specified when an objective is assigned to an employee on their behalf, but an employee cannot associate an objective with a priority if they are creating this for themselves.
Add a Priority
Step One
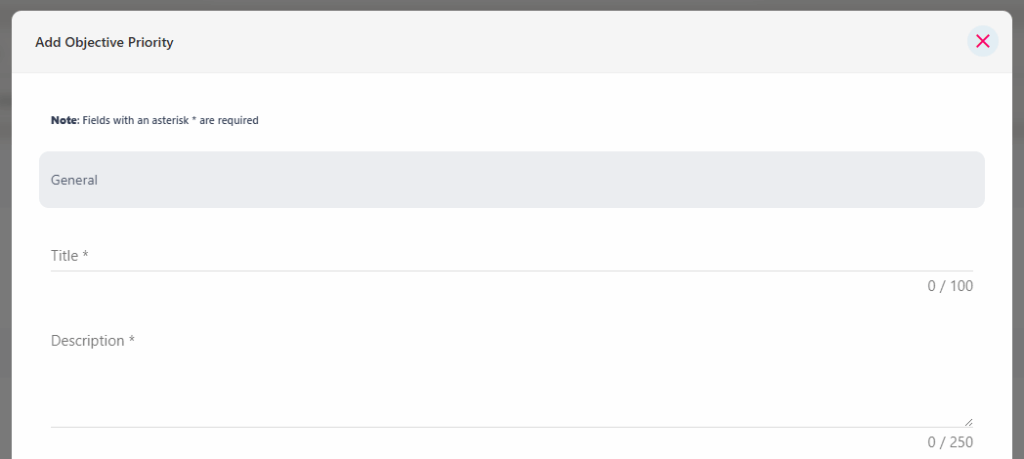
Hover over the Objectives and Reviews area of the platform and navigate to Configuration ➡️Objective ➡️ Priorities. Select the ➕ next to Priorities to open the ADD OBJECTIVE PRIORITY pull-out drawer.
Step Two
Create a title for the priority – this is what will display in the drop-down drawer when a priority is selected as part of objective creation (example of manager view below). The description of the objective priority will only be seen by system administrators.
Step Three
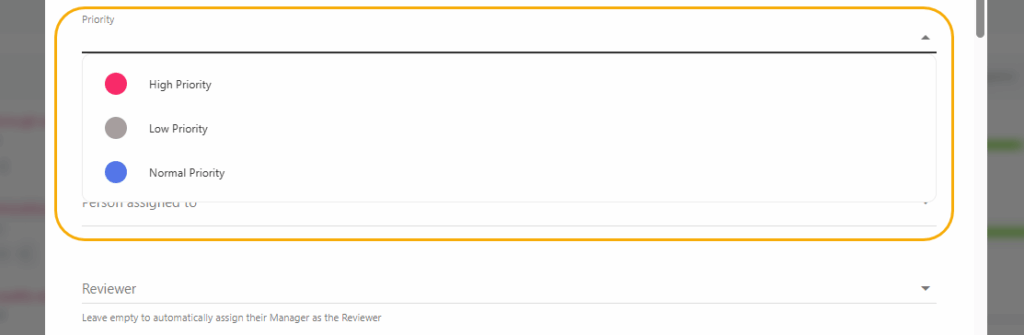
In the Priority drop-down field, you can order the importance of this priority type. For example, if you have three different priorities then your highest priority should be 1 and your lowest priority should be 3. The Objective Priority Colour is the colour of the circle which is displayed next to the objective.
Step Four
Click the SAVE button in the bottom right-hand corner of the drawer to add the priority to your platform.
Configure a Priority
Step One
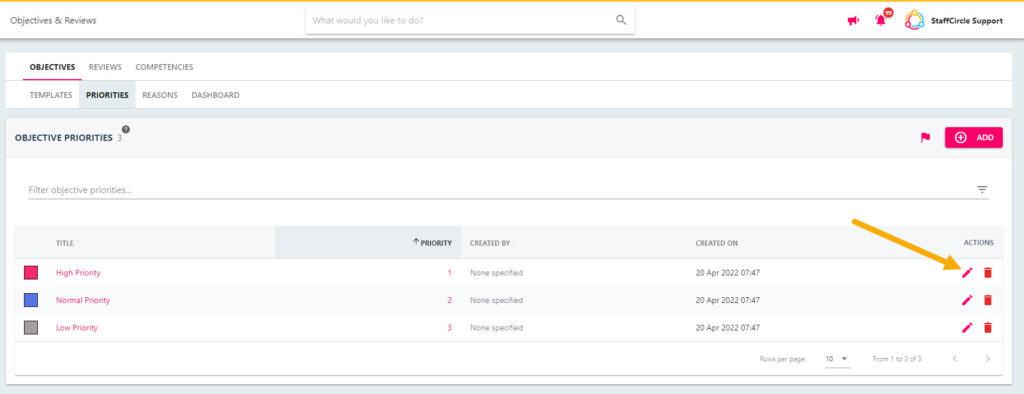
Hover over the Objectives and Reviews section of the side-bar, then navigate to: Configuration ➡️Objectives ➡️Priorities. Then select the Priorities title to view a list of platform’s priorities
Step Two
Select the pencil icon next to the priority in the ACTIONS section. This will open the UPDATE OBJECTIVE PRIORITY pull-out drawer.
Step Three
Update the fields within the form (further information on the fields can be found in in the Add a Priority section above), then click the SAVE button in the bottom right-hand corner of the screen to save any changes.