Create a review for an employee
Reviews are tailored for your organisation, this includes the types of reviews which can be assigned, the individuals involved, and the questions asked as part of the review. Reviews in your platform may vary from more formal types of review (probationary reviews, annual appraisals, quarterly reviews etc.) to more informal types of reviews (121s or quick check-ins).
Creating a review in the platform is quick and easy, and if there is a reoccurrence you may only need to perform the below steps once as the system will automatically add create the next review in the sequence.
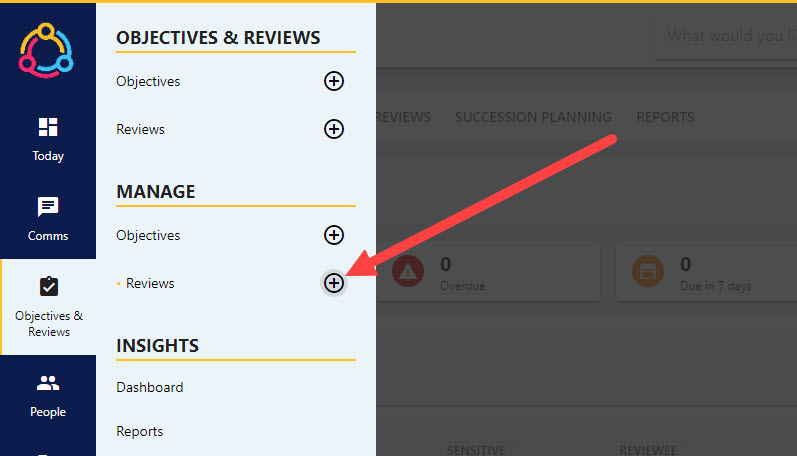
Step One
Hover over the Objectives and Reviews areas of the side-bar to the left-hand side of your screen – this is usually displayed as a clip board icon. Then navigate to: Manage ➡️Reviews. Select the ➕ next to Reviews to open the ADD REVIEW pull-out drawer.
Step Two
The ADD REVIEW pull-out drawer will contain a series of tiles – each of which pertain to a type of review you can create in the platform. You will initially see the six most-used review tiles, however you can use the search bar or select the ‘View all’ button to display a definitive list of reviews.
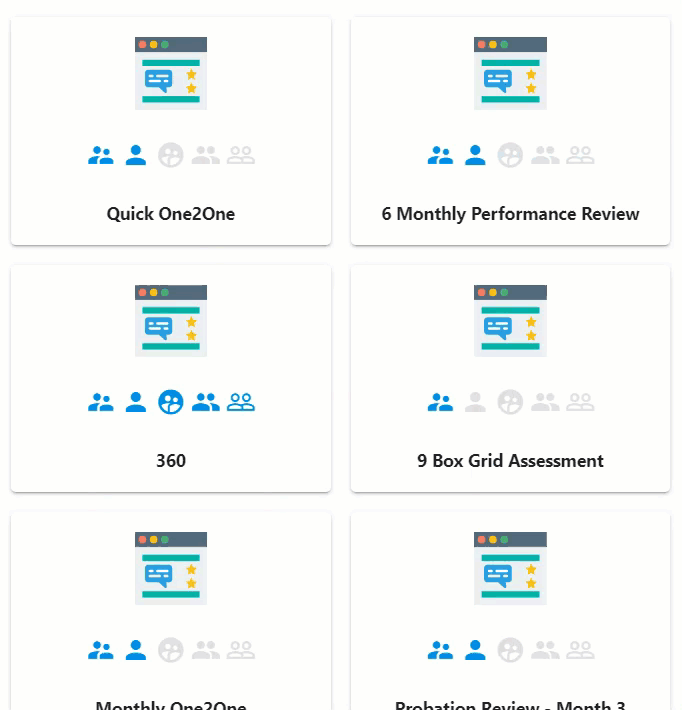
Hovering over the objective tile will provide further information as to what the review will contain including: visibility of the employee’s open objectives, assigned skills, whether the review is associated with a score, and the recurrence period.
The blue people icons are associated with review feedback, each icon represents a different persona (reviewee/employee, reviewer/manager etc.). Each review type will have questions for the reviewer to respond to.
Step Three
Selecting the title will take you through to the first page of the wizard. The review’s Title and Description are pre-populated by the template and in most cases doesn’t need updating. Select NEXT to move to the next screen.
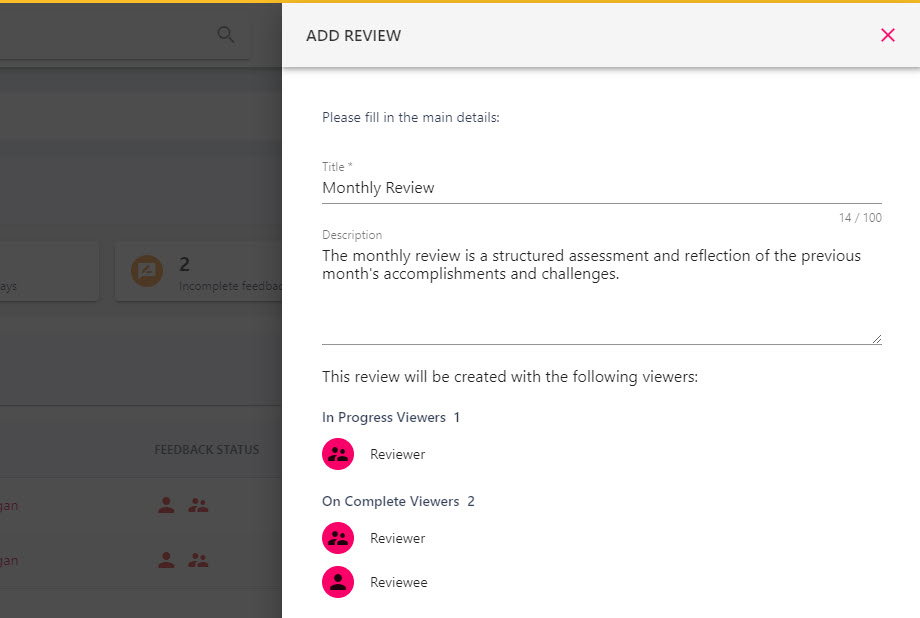
The lower half of the page will confirm who has visibility of the review when it’s in progress, and when the review has been marked as completed. The reviewer will always have visibility of the review when it’s in progress.
Step Four
Assign the review to the employee or employee(s) from the ‘Reviewee‘ drop-down menu. If you select multiple employees, this will create separate reviews which are not connected in any way.
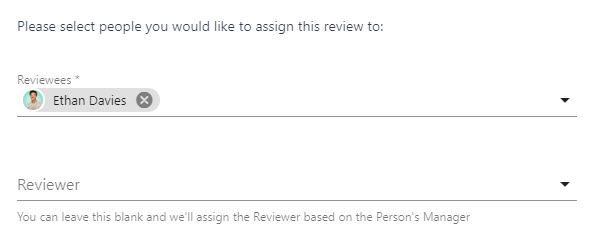
The Reviewer will default to the employee’s manager, however you can select another name from the drop-down menu if you wish to change this to another individual. The reviewer is the individual who oversees the progress of the review.
Select the NEXT button at the bottom of the page to move on to the next screen.
Step Five
Use the date-picker to select a due date for the review, here you can also specify a time for the review to take place.
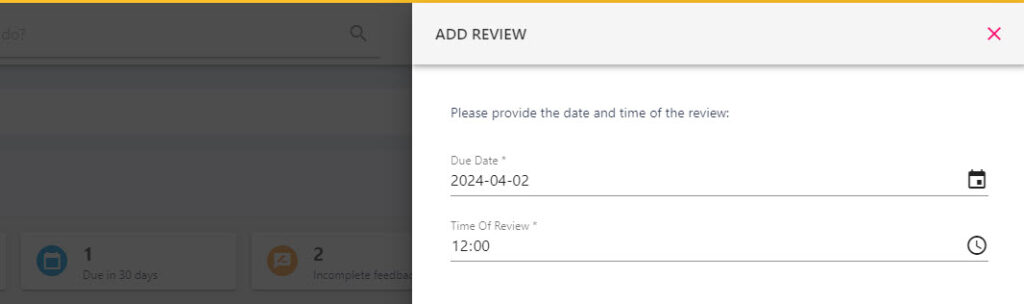
Once the review has been created, a notification will be sent to the Reviewee and the Reviewer. This email will contain an .ics file attachment which creates an event in the individual’s calendar. The date and time you specify on this screen will be reflected in the .ics invitation.
Step Six
On the next screen, you are able to upload a document to the review. Otherwise, click the NEXT button to move to the final page of the wizard.
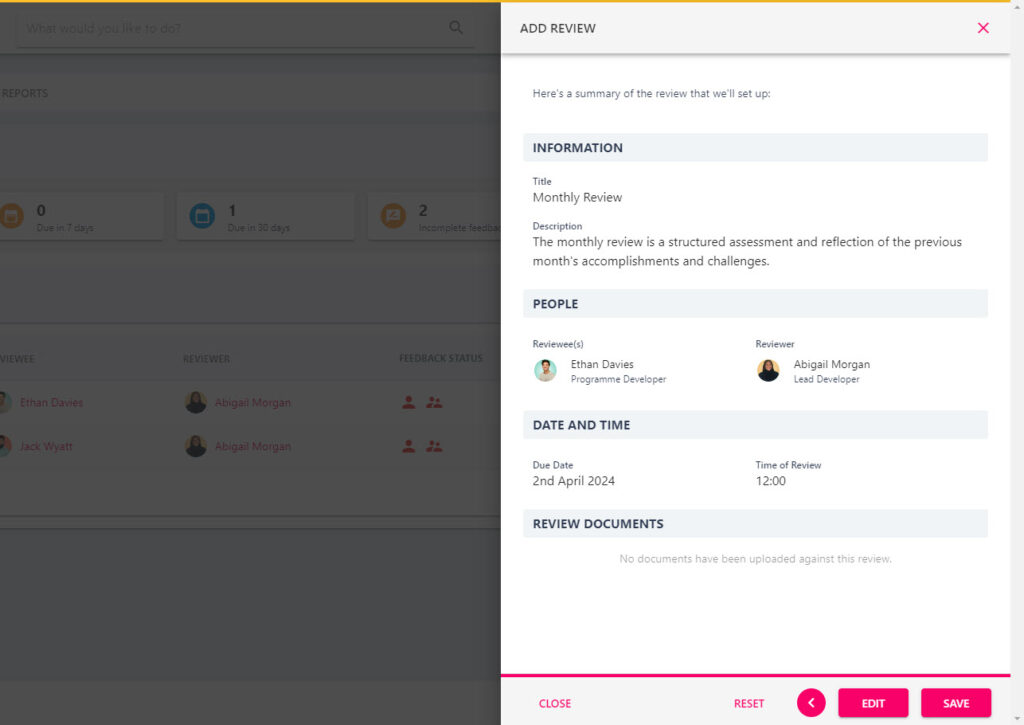
Step Seven
The final page of the wizard summarises the information entered on the previous pages. Double-check that the details are correct and click the SAVE button to create and assign the review.