Publishing Content
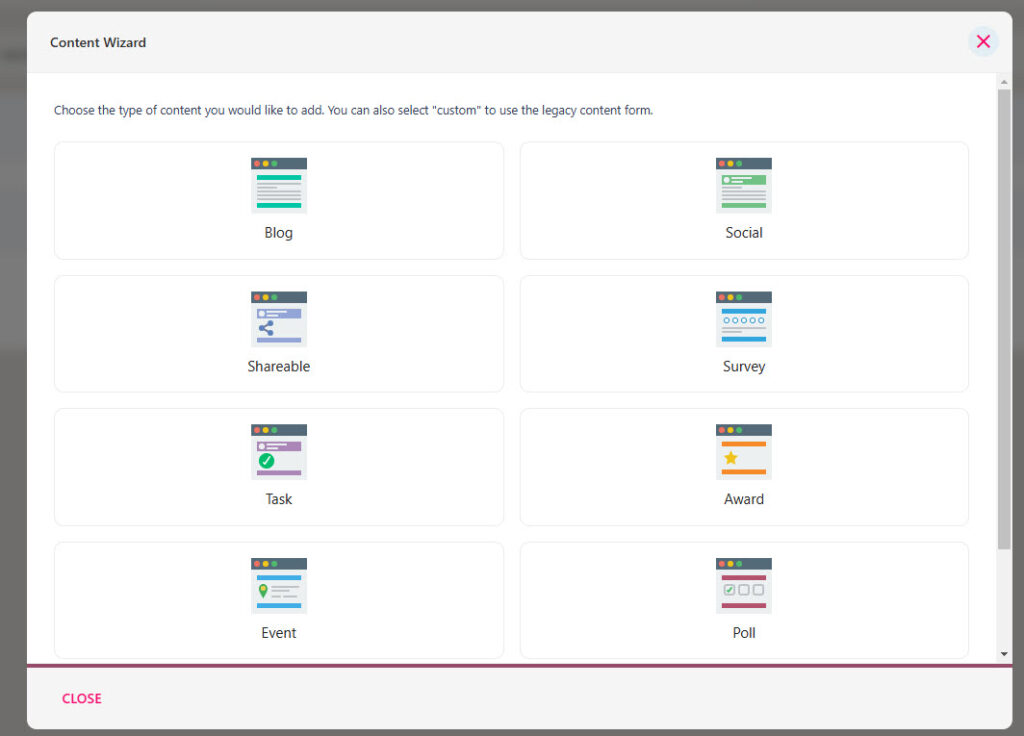
You can publish eight different types of content in your platform for your employees to view, allowing you to create a vibrant and engaging posts which engage your employees with your business activity. You can publish eight different content types to a feed, but we have a dedicated guide here which will show you what each post looks like, and great examples and use cases for each.
Most platforms will contain one Main Feed (default feed), which can be used to post the majority of the content for the organisation. However, StaffCircle will allow for additional feeds to be created which can help you to better organise your content.
Publishing Articles to a Feed
Step One
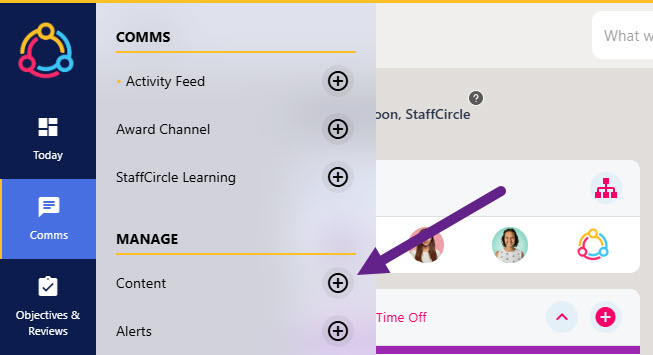
Navigate to the Communications area of the platform by hovering over the Comms section of the side-bar, then navigate to: Manage ➡️Content. Select the ➕ button next to Content to open the CONTENT WIZARD pop-up displaying eight individual tiles.
Step Two
Select the tile pertaining to the content that you would like to create. Blog and Social are the most commonly used types but you can refer to this guide for information on publishing other types of content such as events, polls, and shareable. Many of the steps shown below will appear when creating content in the platform.
Step Three
The title will appear across the image on the content tile, so make sure it is snappy and captures the reader’s attention. The topic is searchable within the feed so ensure to use a tag #hints. Images help draw attention to the post. You can have one image per post, but you can embed multiple images in the body of the content later.
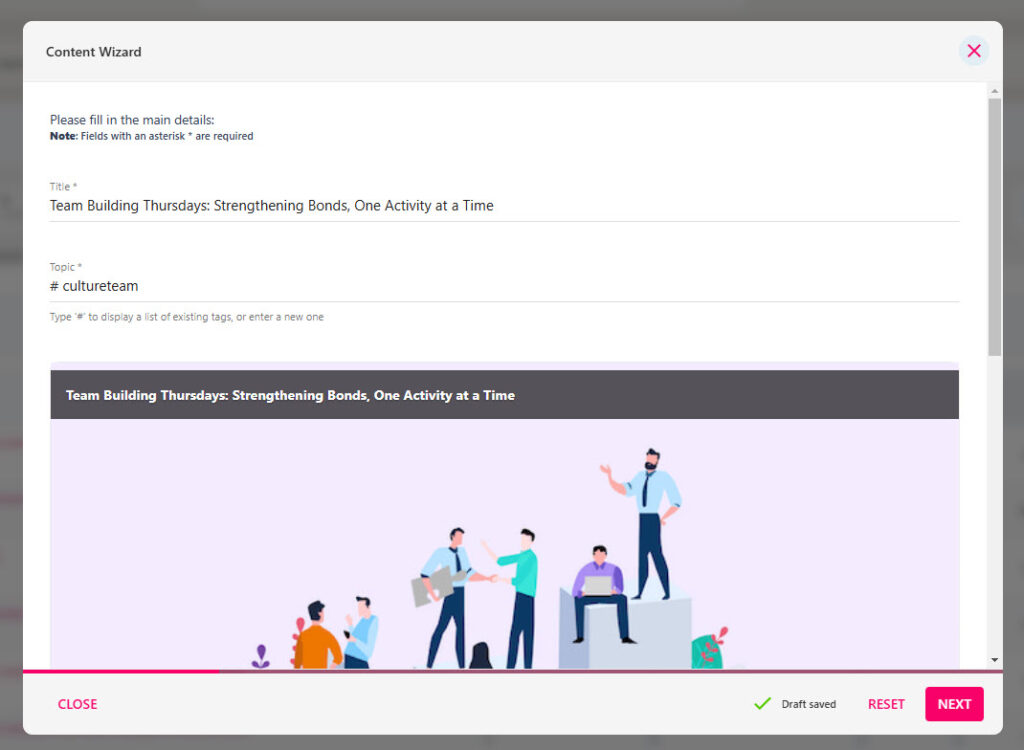
Finally, add your ‘teaser text’ in the Content Summary text box at the bottom of the form underneath the image. This is the text which will appear on the feed underneath the image, but is not the body of the content itself. It can be used to entice users to click on the post and find out more about your article.

Click NEXT to move to the next screen where you will be able to create the article content.
Your article will save in a draft state, so if you make a start on a post, you can always come back to it later and pick up from where you left off.
Step Four
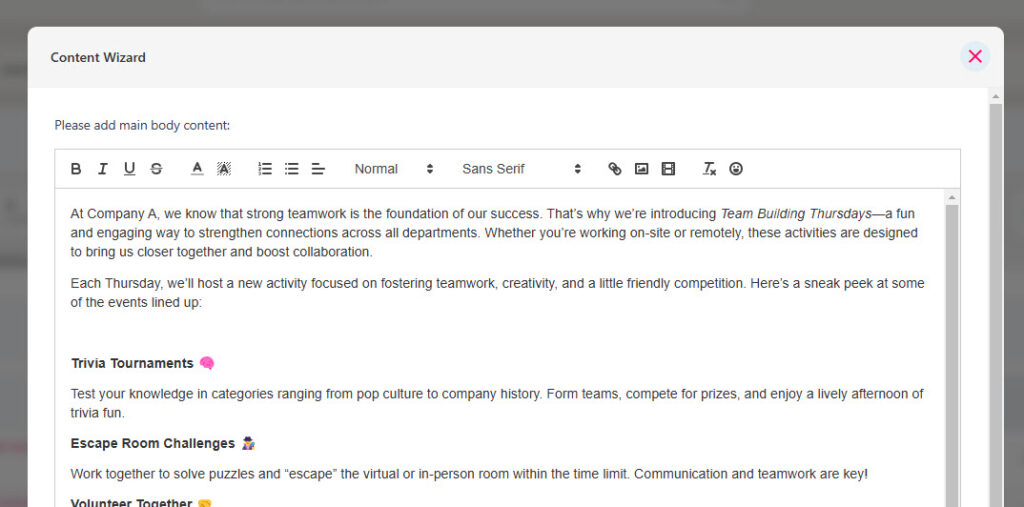
This is where you can write the body of the article The editor allows you to change the font, format and add images and videos as well as external URL links. You can also mention people, teams, departments or sites within the article by entering an @ you will see a popup appear where you can select one or more items. When you’ve finished creating your post, click NEXT to move to the next page.
Step Five
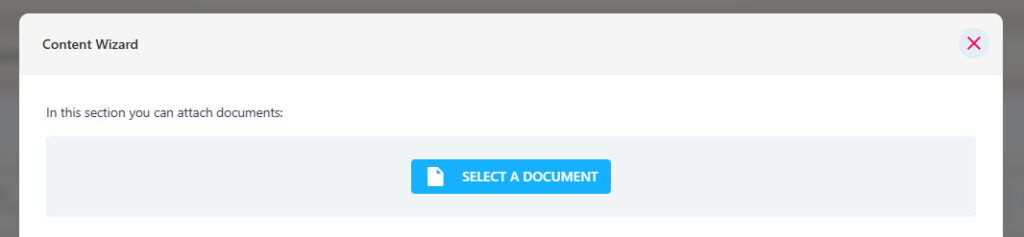
On this screen, you will be able to attach a document to the post. The document must be selected from the document library to be shared. If a document has been attached, a paperclip icon will display on the post itself after it has been published. The user can select the paperclip icon to download a copy of the document to their device.
Click the SELECT A DOCUMENT button to upload a document, then click the NEXT button to proceed to the next section.
Step Six
In this section, you can set the Priority of the message and also Pin the article for a period of one hour to four weeks. Pinning the article will make it stay at the top of the feed for the set duration to ensure maximum visibility.
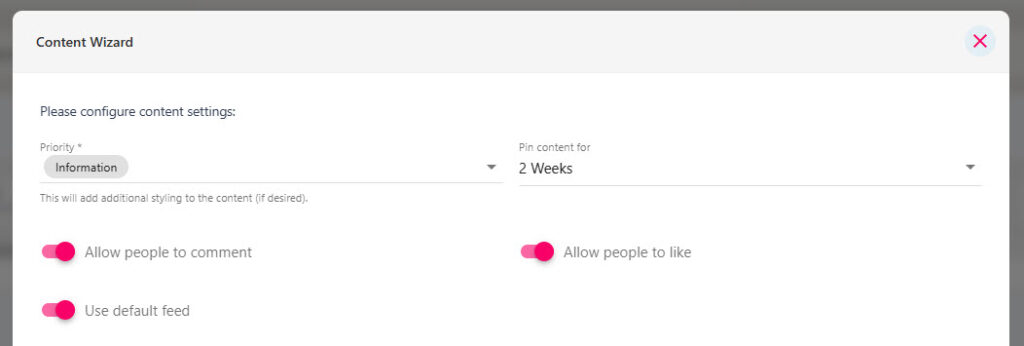
You can enable readers to like or comment on the post but enabling the toggles underneath the drop-downs. If you keep Use default feed toggled on it will post to your Activity Feed. If you turn this toggle off, you can then choose to post the article to one of your custom feeds and then select the channel you wish the article to be posted in.
Click the NEXT button to proceed to the next section.
Step Seven
On the final page of the wizard, you can select the audience for the post – these are the individuals who will be notified and have visibility of the post after it has been published. You can select between EVERYONE (the whole organisation) or I’LL CHOOSE which allows you to select certain Groups, Individuals, Departments or Sites (locations) which will appear when you type the @ key.
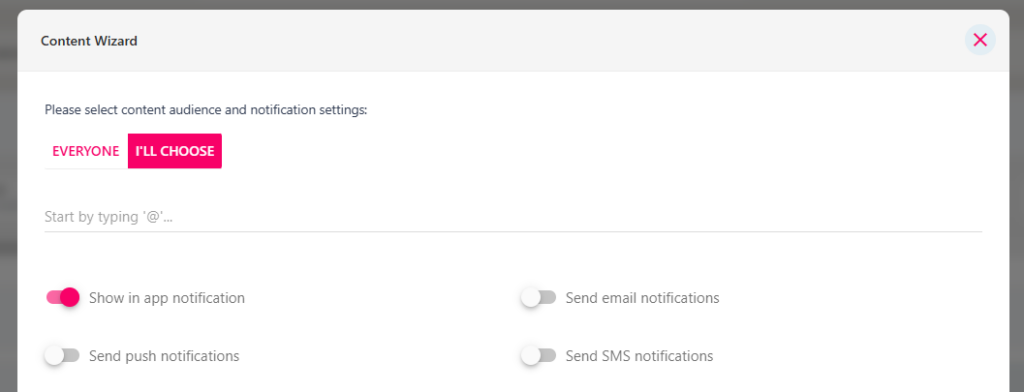
Finally, you can use the toggles underneath to determine what notifications will be triggered after the post has been published. What toggles have been enabled will depend on what integrations you have enabled.
If you are publishing your content to a custom feed the notifications and recipient list will inherit the characteristics of the channel you are publishing it to.
Step Eight
Click on the PUBLISH button in the bottom right-hand corner of your screen. You can decide whether you wish to publish the post immediately, or schedule the publication for a later date.

Depending what permissions have been enabled, you’ll then be asked if you’d like to publish the article as yourself or on behalf of another StaffCircle user.
Step Nine
Your article will now publish to the feed unless you have scheduled the publication for another date/time.